Wednesday, April 16, 2014

Project 3.1.7 Machine Control Design

Using RoboPro Software and Fischertechnik parts, create a program and build a design to solve two of the problems.

We chose to create something to solve problems #1 and #5

Problem 1: Start / Finish Line (Hardware Level 1 Software Level 4) 

The Olympic committee would like your team to invent a control system for use with 
track and field running events. They want this device to automatically record the time 
and beep when the first runner crosses the start / finish line.


This was our program.


This was our design build.

We had two separate tracks and a segment of program for each track. The motors would go backwards until it hit the switch on the side of each track. Once they both were stopped at the starting line, the center switch was pressed to start the race. The center switch started the timer and both motors. At the end of each track was a lamp and a photo-resistor. When one of the motors passed between the lamp and photo-resistor the light will be blocked and that will trigger the timer to stop as well as the motor.


The video is kind of blurry when the computer screen is shown. We basically were showing that the timer had started and when the first motor blocked the timer stopped at 116 seconds to show the winning time.


Problem 5: Elevator (Hardware Level 4 Software Level 4)

A company would like to begin producing residential elevators. Your team must design the control system and a prototype of an elevator that can go between three floors in any combination. The prototype must include a set of three switches to represent each floor inside the elevator. Each floor the elevator stops at must have a call button and a set of three lights to indicate where the elevator is currently located. 


This was our program


This was our design build

We had one long track going up and also secured our control panel on the base 

Wednesday, January 29, 2014

Activity 3.1.6 Opened and Closed Loop Systems

Procedure
Activity Part I
  1. Build the support system and track
  2. Add the motor and gearbox to the track and then wire the motor
  3. Write a program that will shuttle the motor back and forth 1.5 seconds each way 20 times


Activity Part II
  1. Place a mini switch on both ends of the support system and track. Wire the switches to I1 and I2. 
  2. Write a program that will shuttle the motor back and forth five times based on feedback from when the switches are pressed.


Activity Part III
  1. Remove the mini switches. Add the smaller building blocks to the ends of the gearbox and motor. Use the larger building blocks to create extensions from the track on each end. Add covered lamps to the extensions using smaller building blocks on one side of the track. Using the same attachment method, place a phototransistor across from one lamp and a photocell across from the other.
  2. Write a program that will shuttle the motor back and forth five times using the phototransistor and photocell for feedback.


Friday, January 24, 2014

Activity 3.1.5 Variable Functions

Procedure
  1. Create a program that will control how many times the lamp will turn on and off


Thursday, January 23, 2014

Activity 3.1.4 Branch Fuctions


  1. Create program with two switches so that they will turn on a lamp when one switch is pressed and turn off the lamp when the other switch is pressed
  2. Run the program 

1. Wire the potentiometer and turn it counter-clockwise until it stops
2. Test it: the box next to the input reading became checked and unchecked and the number switched between 1 and 0.

Wednesday, January 22, 2014

Activity 3.1.3 Basic Programing


Procedure

  1. Construct a flowchart that will turn a motor on and off. Using RoboPro software.
  2. Test the system to see if your flowchart performs as written.
Part I:
  • Start program
  • Make motor start
  • Insert time delay for 3 seconds
  • Motor resumes
  • Make motor stop
  • End program

Part II:
  • Start program
  • Make motor start
  • Run 2 seconds
  • Stop for 2 seconds
  • Run for 2 seconds
  • Make motor stop
  • End program

Wednesday, January 15, 2014

Activity 3.1.2 Flowcharting


Shape Meanings


Procedure #1

Procedure #2

Procedure #3


  • How is flowcharting similar to using a map to plan a route for a trip?


             You reach landmarks which you then decide where the next one is. Enabling quick successful stops until you reach the target location.

  • Describe a process that you perform every day. Develop a flowchart that illustrates the process.
Making Toast

Activity 3.1.1 Inputs and Outputs


This activity was used as an introduction to our future robotic projects, and getting an understanding of how inputs and outputs work in both analog and digital formats.


We used Fischertechnik components including: Interface, power supply, and USB cable, RoboPro software, and some complete wires

Everything is plugged in

Testing different things with RoboPro

Thursday, December 12, 2013

Centroids: The Last Part

Using MDSolids I found the centroid of beam cross sections for two Flanged shapes. After making dimensions it computes where the centroid would be.


Wednesday, December 11, 2013

Wednesday, December 4, 2013

Manila Folder Bridge Part I

Quinn, Conner and I worked as a team today for this design build challenge.

Criteria: Build a structure that can support as much weight as possible over a 18" gap.
**Magazines will be the weights and two separated tables will be the gap**

Constraints Part I:

Materials:
  • 2 Manila Folders (letter size)
  • 2 feet of tape (may not use a piece of tape longer than 6")
Weighing: 
  • Magazines will be used as "weights"
  • Your "score" for our competition is determined by how many magazines your structure supports!
  • Magazines will be added to your structure one at a time until "failure" is achieved
  • You may place magazines anywhere on your structure as long as:
    • All magazines must rest between the two vertical edges of the gap your bridge is spanning (magazines must be over the "gap")
    • No magazines may tough the tables (magazines may not be piled up to "self support themselves)
Construction Practices
  • Only one end of your design may have a "pinned" connection to the table top (i.e taped). The other end must act as if it were on a "roller" connection (i.e. laying on the table top).
  • Manila folders may not be layered more than 3 layers thick at any location.
  • Parallel structural members may not touch directly (they can be connected via non parallel connection members (ex. a "ladder" style design))
Our Design:
  • Plan 1: fold the manila folders into thirds and place them across the gap connecting them with a few folded strips in the center
  • Plan 2: make a design like the bed of nails on Mythbusters- make a lot of little pyramids out of one folder and then tape them all over the other one that is spanned across the gap to try and distribute the weight of the magazines
  • Plan 3: use the manila folders and fold them into thirds and create a triangular prism place them side by side separated by two inches across the gap
  • Final plan: make the folders into triangular prisms and put one inside the other across the gap


We managed to somehow get 50 magazines on our structure for a brief second before we achieved failure!

Monday, December 2, 2013

Centroids Part II

We finished part II of the centroids packet today with our table groups. Corin, Conner, Conner, Quinn, and Mark were in my group.

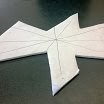
The first part was to make a complex shape out of a manila folder or some foam board
Sadly part of our shape was cut out of the picture
Then using a thumb tack, sheet of foam board and plumb bob made out of string and a roll of tap
The process of drawing lines where the string hung in front of our shape
We finished drawing lines from all of the corners using the plumb bob
This is the first side we tried
Turned out our approximated centroid location was off so we tried again
We redid the lines on the other side
This time we made a little bigger holes to allow more free movement
Our new approximated location for the centroid was much more accurate
Using a finger on the centroid we could balance the foam board shape
Yay!!!

Sunday, December 1, 2013

Beam Deflection

My team members were Corin, Conner, Conner, Quinn, and Mark. Using a 2x4, a few phone books and magazines, and a measuring tape we would use beam deflection to try to calculate the weight of a group member.


Mark was our first attempt

Conner L. was our second attempt

It was pretty cool to see how close we could get to the actual weight of the person.

Centroids Packet


Free Body Diagrams

Fish Bowl and Logs in Container

Stop Light and Questions


Friday, November 8, 2013

Mousetrap Racecar


The first part was challenge to complete was picking a good partner, and that was easy to do.
Quinn and I got the parts to build our car right away and started to brainstorm.

Criteria:
  • Design, build and compete with a Mousetrap Racecar (at least 2 axles).
  • Maintain a clean workspace
Constraints:
  • One mousetrap
  • No more than 12 inches of masking tape
  • Fischertechnique robotics parts
  • No more than 24 inches of string
  • All materials must travel with your vehicle
  • Work through the stages of the event
  • Additional materials by Instructor approval

Achievement #1
"Brainiac"- brainstorm 10 ideas for your design
  1. Dune buggy style- long axles with wheels far away from the body
  2. Really fat tires
  3. Wheels wide set in the back and close in the front
  4. Wheels wide set in the front and close in the back
  5. Use string to secure the axles to the mousetrap
  6. Use tape to attach axle on bottom of the trap
  7. Use a third set of wheel to propel the car
  8. Use the plastic treads to keep the wheels straight
  9. Connect all of the axles together like the wheels of a train
  10. Set off the trap by pulling a piece of string
Achievement #2
"Visualize it!"- Create a sketch of design and label key parts


Achievement #3
"Build it!"- Build your design and document it with a photo
The evolution of our mousetrap racecar


Achievement #4

"The Price of Glory"- If each part you use costs $1, evaluate the total cost of your build
  • 6 wheels: $6
  • 8 yellow building pieces: $8
  • 7 red attachment parts: $7
  • 2 axles: $2
  • 1 piece of string: $1
  • 1 piece of tape: $1
  • 1 mousetrap: $1
Total Cost: $26

Achievement #5

"Competitor"- compete in the 2nd Annual Mousetrap Racecar Challenge

Achievement #6

"Long Distance Winner!"- Travel the furthest in the distance race

Achievement #7

"Feedback"- Collect feedback
  • + We won without adding extended length like
Achievement #8

"Re-work"- Change your build based on the experience with the race/feedback you collected. Document it

-Originally we had rubber bands on the 2 front wheels and the back 4 wheels

Race 1: (original build) We went 7 tiles and place 2nd to last

-We removed the rubber bands off the 2 outer rear wheels

Race 2: (Change 1) We only went 5 tiles

-We put the rubber bands back on the outer 2 rear wheels and removed the middle wheels and axle


Race 3: (Change 2) We went 10 tiles passing our furthest distance

-The string would unwind completely and then would rewind on the axle causing the car to go backwards.       We extended the length of the string a few inches


Race 4: (Change 3) We went 20 tiles and moved into 1st place

-The extra length of the string helped a lot, so we decided to make it a little longer


Race 5: (Change 4) The extra string ended up just getting tangled around the axle and gave us a worse result

Achievement #9

"Game Changer"- Develop a new rule or change to the game that you feel would make the event even better. Explain.

Creative Mode Challenge: Following the acceleration and distance events should be the creative mode challenge
  • Each team during a set amount of time (10 minutes or so) can make a really creative change to their cars.
  • With almost no limitations on what they want to add to it (no motors/battery powered additions)
  • After the new addition have another distance race to see whose car can go the farthest
Achievement #10

"Name it"- Invent a name for an achievement that you think is better than one we currently have.

Change "Brainiac" to "Lightbulb Master": originating from Gru in Despicable Me whenever he comes up with a new idea

Achievement #11

"Leave it Cleaner Than You Found it!"- Did you leave your work space cleaner than you found it? Explain.

We left our work space cleaner than we found it by putting aside working on creating a blog post during class time to help sweep the floor and put away all the pieces of robotics kits covering the tables.

Achievement #12

"Design/Build"- What is a "Design/Build" process? How did your experience with this challenge relate to that? Why might you experience this in a career related to technical innovation?

The process is: define goals/needs of your build, brainstorm, prototype 1: labeled sketch/drawing, collaborate ideas for change, prototype 2: build the sketch, test it, feedback, change, and test again (keep changing and testing until satisfied). For this challenge we built our initial design and tried to just add things to that original idea, until the last minute when we couldn't get it to work. We decided to start from scratch and finally we got our car to move. During the races we changed our build a little bit each time until we were satisfied. When it comes to technical innovation, you won't know how to change things until you test them to see the flaws. You can't test them unless you design and build  them, so if you want to be successful in the field than you will definitely run into some design/build processes.

Sunday, November 3, 2013

Creating Our Own Pulley System

Our task was to work in a group and create a pulley system with a fixed and movable pulley.


We used a spring scale to measure the amount of force it took to lift the movable pulley and the weight we attached to it. It took .95 Newtons of force to lift it. Then using the pulley system we used the spring scale again to measure the amount of force needed to lift the movable pulley and weight. It took only .4 Newtons to lift the weight. The mechanical advantage is 2:1.